Wednesday, February 29, 2012

Competition Hair - Gymnastics

Gymnasts Hair... a Journey I am on completely blind!


Growing up as a dancer I am a total fish out of water having two daughters who decided to go into competitive gymnastics.  This was our first year on this journey and we have learned a lot... most importantly we have learned that we still have a lot to learn! 


Appearance if key in both gymnastics and in dance, but there are so many extra factors to consider in gymnastics when creating a hairstyle.  The styles need to match (well this is the ideal as it looks clean and represents the gym family in the best light), you need to consider each routine and make sure that the bun, braid or ponytail won't get in the way of the gymnast.  The, just to throw a little wrench in the system, this could change from level to level!  We also have to embrace that the younger levels are almost always scheduled in the morning time slots so we have to do 7-10 hairstyles on young girls, while drinking our coffee at 7 or 8 am! Somehow..... we pull it off!   


So tonight this is my newest idea.... simple enough, not a whole lot of creativity went into this, but it allows for coaches to move the height of the bun higher or lower depending on the needs of the gymnast! 


Start by sectioning the hair... Part the hair depending on how high you will need the bun.  Secure the hair that is not to be in the braid so it doesn't get in the way.  Then begin the REVERSE FRENCH BRAID at one ear and you will continue towards the other. 


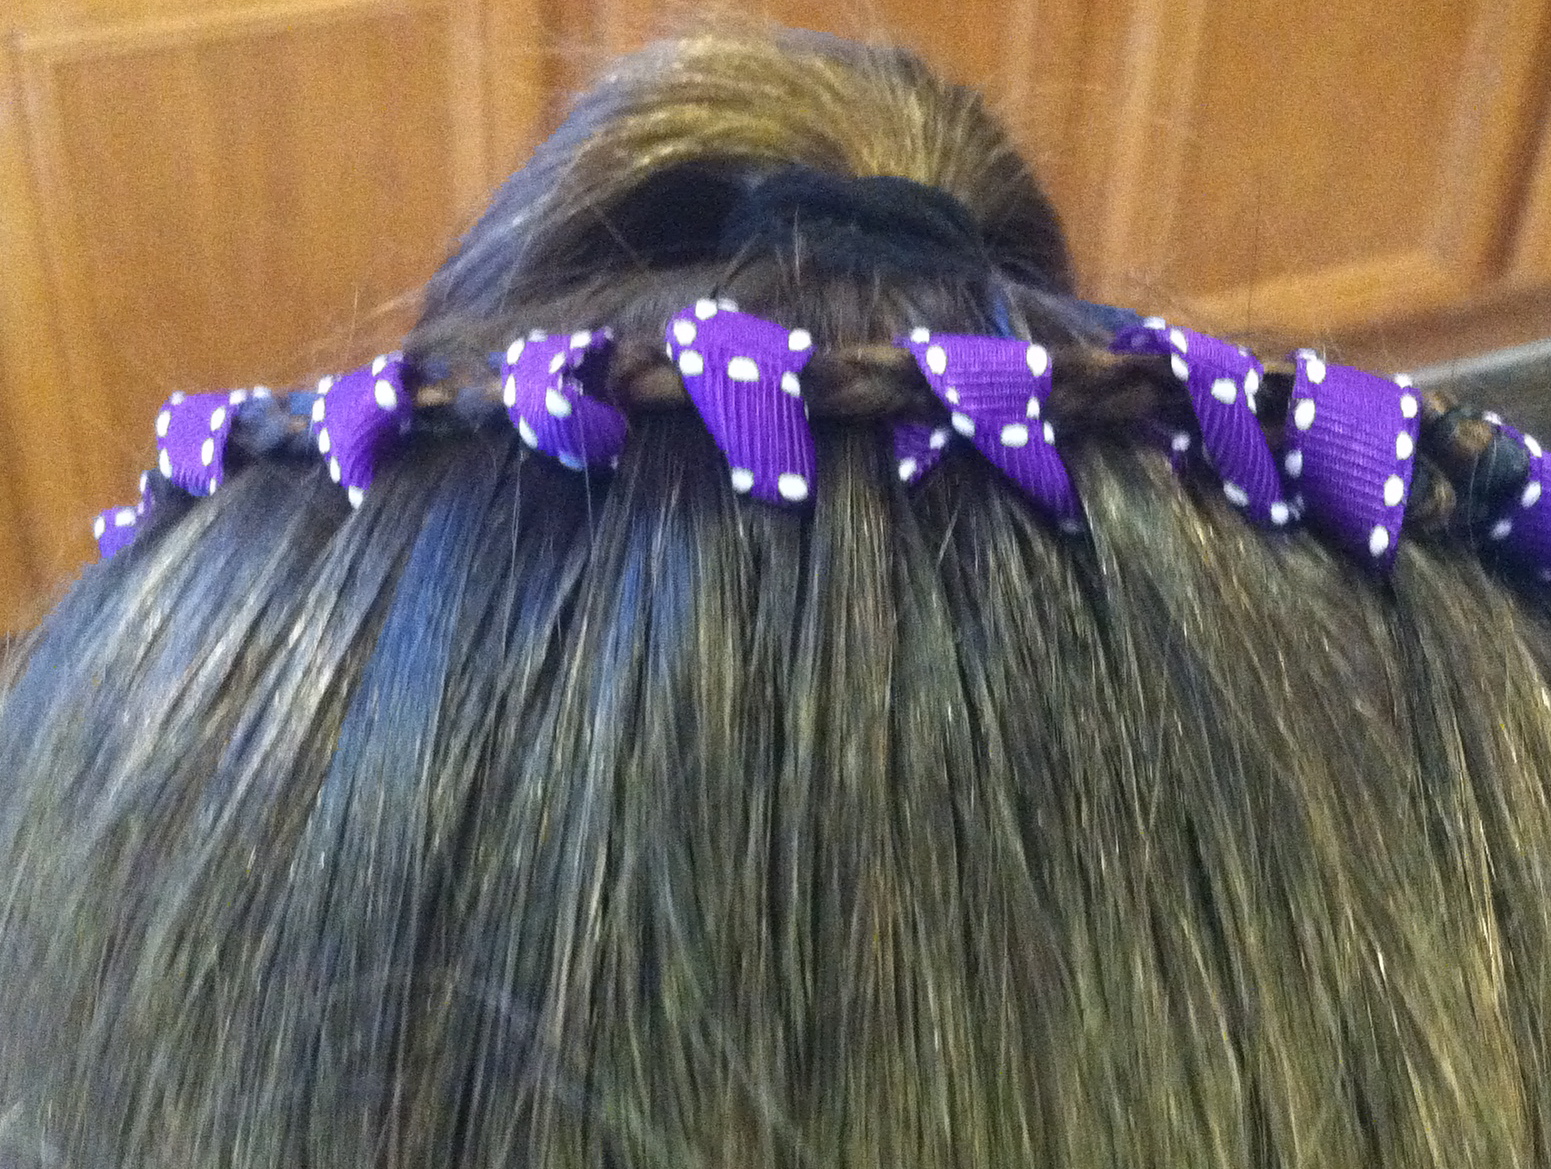
IMPORTANT!  This french braid ONLY takes hair from one side, the front of the head... the side which will be closer to the bun (at the completion of the hairdo does not have hair pulled into the braid) this allows the braid to stay off centered and closer to the bun area) 


The reason for the REVERSE french braid is that #1 it stands out well #2 holds fly-aways better and #3 when a child sleeps in it it withstands it better for the next morning so for those 7 am competitions, these braids will be your friend!!


When you reach the other ear simply secure it with a rubber band that closely matches the child's hair  (do not continue braiding all the way to the end of the hair... stop at the ear.  


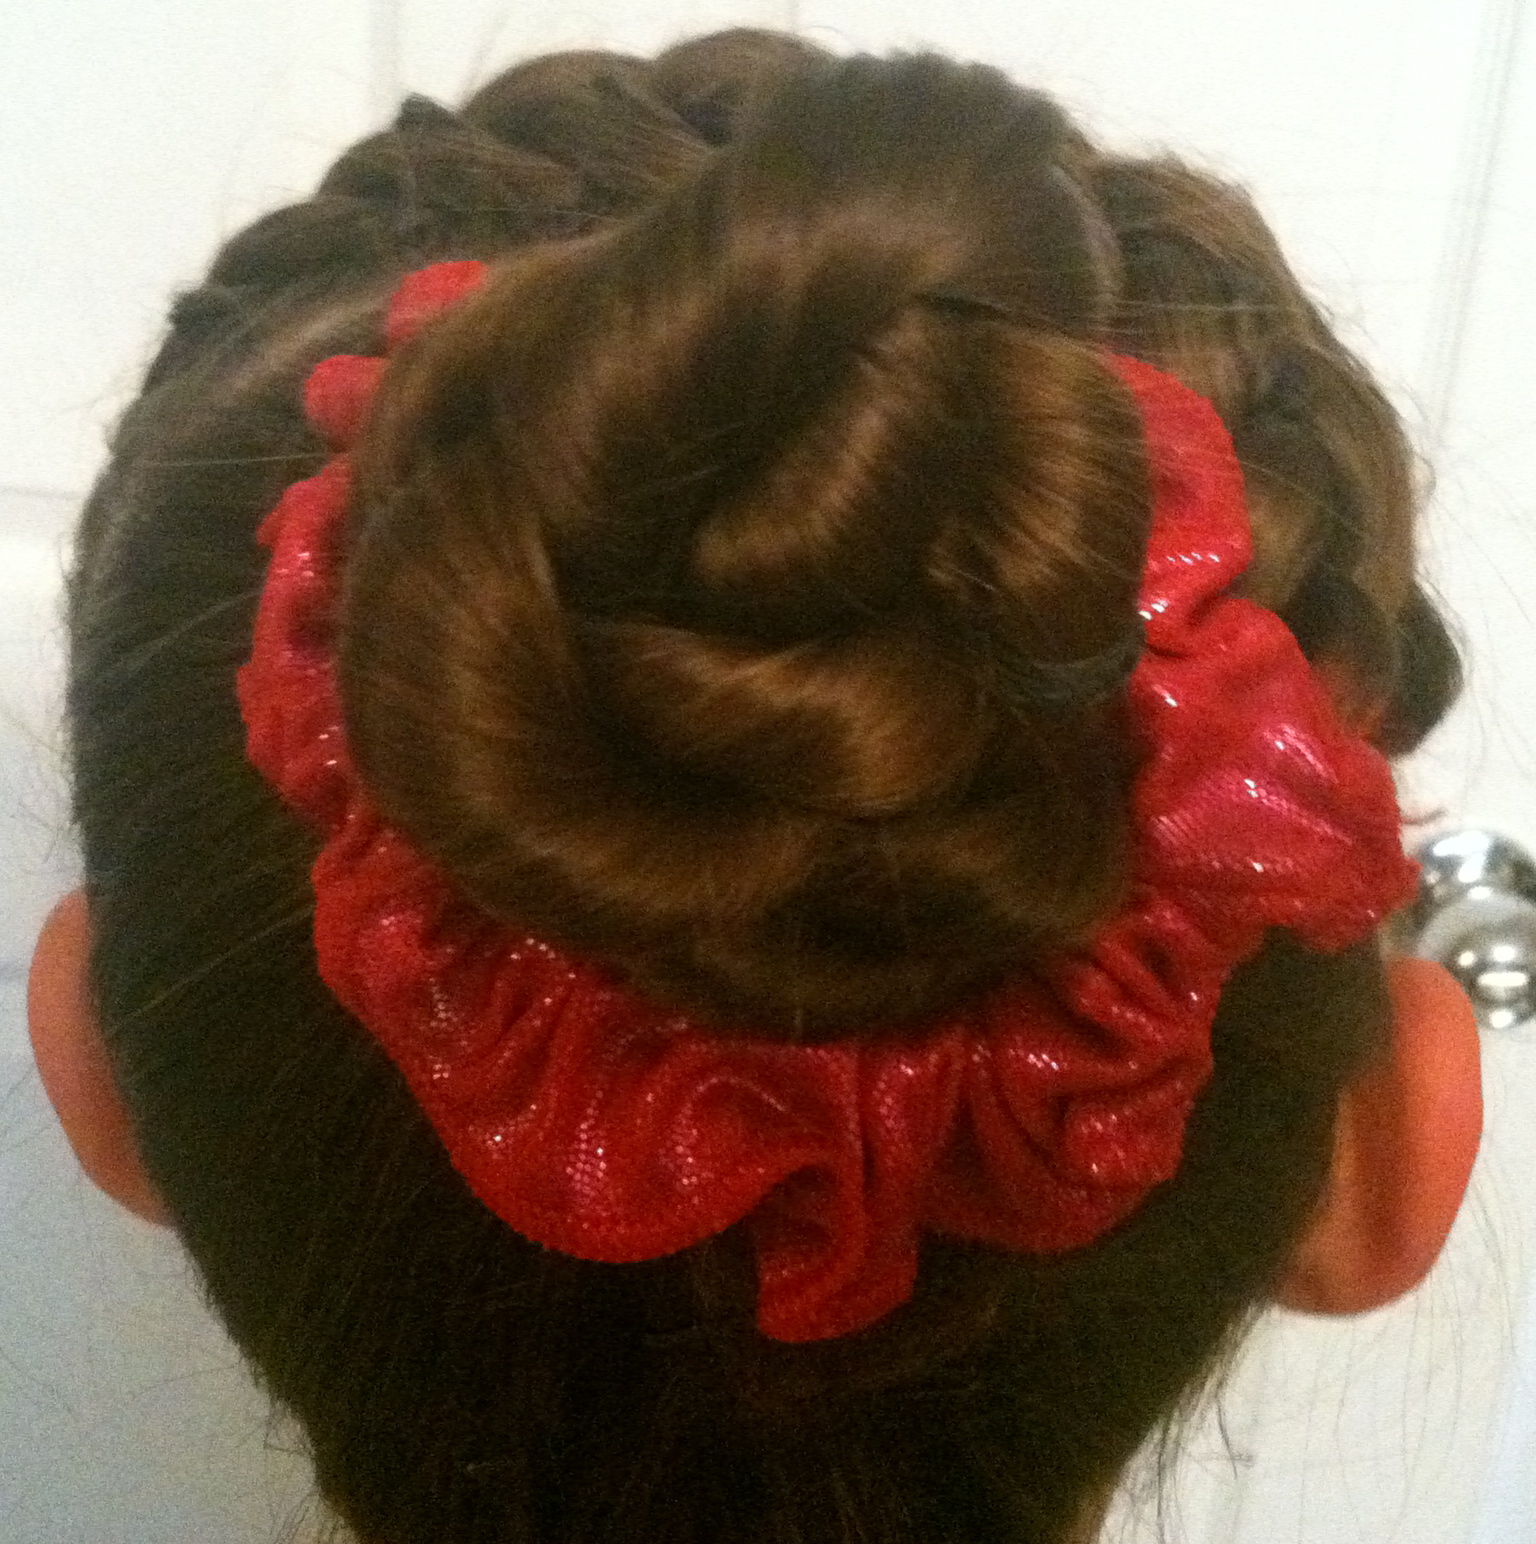
Now pull the rest of the hair into a ponytail.  The height of the ponytail will depend where you need the bun for the needs of the gymnast or your personal style if this is not for a meet.  Secure it with a light rubber band.  


Now I like to make my buns with braids or twist braids... This time I used  the remaining of the french braid and did a quick twist braid.  I did the same with the ponytail I had created and joined them together to pull them into a bun.  


Of course, being Gymnastics, the bun was secured with a scrunchie... if it was for any other occasion I would have to have gone with one of my bows :-) 


And there you have it... Your award winning, quick and easy hair for a 7 am rush... the only thing you will need after this is 


COFFEE!!!!

MAMA, What are you DOING?!?!?!? A Halo of Course!


Nothing like sewing my daughters hair in the morning!  I had so
much fun this morning & I think the best part was hearing Bella say 
"Mama, what are you doing!?!"  
She had this tone in her voice that made me laugh so hard because she sounded a tad worried, but with this wonderful curious giggle!  
So yesterday I was  looking at a picture of a princess Halo that looked like this and as weird as it sounds I decided to figure out a way to make this look without actually buying the item :-) 


Then.... I came home to find purple ribbon and I hunted for the perfect tool..... and hunted and hunted.  Problem was that I didn't know what I was looking for yet.  Until ...... I FOUND IT!  
YES!  A large plastic needle from a craft kit the girls have! 

So, here is my creation:
STEP 1:  Start by using a serum and slicking hair back into a ponytail.  Having the hair smooth will help create the effect we are going for in the end.                                                   Using the sharp end of a comb (at least this is the easiest way) take 2 small sections of hair out of the ponytail.  Re-comb the hair so it is smooth and secure the ponytail 
STEP 2:  Braid the two small sections you left out of the ponytail.  Make sure the braids are neat and smooth so comb the hair with a fine-toothed comb before braiding.   


STEP 3:  Bring Braids up around head and use bobby pin to secure them together at the top of the head.  Do this loosely as you will not leave the bobby pin in.  

STEP 4:  Thread your "needle" (needless to say I do not recommend using a real needle) and begin to to weave your braid into your hair.  
The motion that works the best would be to go in towards the middle of the ponytail (under braid) then bring needle up and out over the braid towards you... then repeat - you have to do this at an angle in order to be able to continuously move up the braid.  
When you get to the top and secure both braids together you can remove the bobby pin


Nana would love our "FREEWAY"- At least it's a PRETTY Freeway!


When we were little our Nana used to tell us that our part looked like a "freeway" (you have to hear it like I do in my head because it has a great Cuban accent to the word freeway!).  Anyway, this simply meant  you did not have a straight part....  so of course it makes me laugh to know that now the "freeway" is in style!  So in order to stay true to MamaSalon style I can't just do a freeway (aka zig zag) part... I have to mix in a gazillion other things, right?!?!   So here is my Zig Zag Freeway, mixed in with the 90's interrupted ponytail, add a few french twists, a few bows and wa-la... something cute and different!  Don't worry, it is way easier than it sounds!  Not easy enough for Nana, but then again I am not sure if Nana would have been able to do this back when she was younger either! 

OK so step by step! 

1. Lets start the freeway (ZigZag part) 


2.  Now make two small ponytails in the front   


3.    Now the best way to put bows into any child's hair is to attach them to the rubber band before.  So prep the bows next.
I like alternating colors - be creative.  Simply tie the bow to the rubber band then add it on top of the other rubber band
  
4.  Split each small ponytail in half and twist each section to the right individually-  then intertwine them by twisting them the opposite direction (left).  Secure them with a rubberband.  Add this to a new sectioned  
 ponytail on each side.  

5.  Continue this on both sides all the way down.  I like a bow on every other one.  At the end you can keep them as separate piggies or join them into one ponytail as I did.  


Monday, February 27, 2012

Wrap Around "S" French Braid

Most people start the dreaded Monday morning with a grunt and hoping to simply get their kids out the door and to school on time.   99.9% of the time that is me.  Today that should have been me (especially after a very long weekend and an awful night's sleep).  Unfortunately for Bella, normal mom didn't wake up... CREATIVE MOM did!  So there she sat, thinking she was getting a ponytail and before she knew it I was tilting her head, pulling her hair,  holding rubber bands in my mouth and juggling a million things for a
WRAP AROUND "S" FRENCH BRAID


Thankfully after all was said and done she was happy and the fact that I added some sparkle hairspray to her hair made me the superstar and took away the annoyance my 8 year old had for me!  :-)  See glitter makes every girl happy!  


A teachers favorite thing... "COUSIN IT"!

I have posted before how teachers must LOVE kids who come to school with their hair down and in their face!  Or better yet, when they arrive with headbands!  Yes, headbands!  Headbands are simply a fidget toy disguised as a hair accessory that never actually stays on a child's head - but they make great looking futuristic eye wear! 


None of us want our children looking like Cousin It and let's face it when we pick up the girls from school, very few of them actually look like the bohemian runway models with the flowing hair :-)  

This is a good view
of the part I made
So, this is my compromise so Dani can wear her headband, it can actually stay in place therefore limiting the chance of it falling off and becoming a toy and I can pick up beautiful Dani from school and not Cousin It.  :-)  I know I am blunt and mean, but my kids love it!  


Start far enough back on their hair so that you don't mess with where the headband needs to be and leave just enough hair for the headband to have a small job to do. 

Then part the hair down the middle and braid or fishtail each side.  Tie the two braids in a knot or two just so they don't hang down (cause as Dani put it, that would be a hairdo mom!) Tie the ends together with a rubberband that blends in with your child's hair color.  Then take the front hair and pretend we are back in the 80's and 90's!!  Lift the bangs, give them a good 'ol shot of hairspray (yes I still think AquaNet is the best!) and use the hairdryer to push them back!  The hairdryer on the cool setting is just fine and you usually will get a great giggle out of your child that will bring a smile to your face!  Lastly, place the headband on and you have done the impossible....
Started the day with a HAPPY MOM and HAPPY CHILD! 


Oh and I added some sparkle hairspray today because a Monday isn't a good Monday without a bit of sparkle!


Sunday, February 26, 2012

It had to be for Dani - Perfectly Dani


Earlier in the day I had tried a hairstyle on Bella and I failed.  Now I know why!!! I should have known when I saw the style in my head that is was simply meant for one person....

DANI
Yes, that style that I messed up on was perfectly Dani and that is the reason why there was no way it was going to work on Bella.... In a matter of minutes I was able to do it on Dani and take a step back to admire the cutest little girl in the world... Ok so I am a tad bias, but still she really is! 


Inside out braid with a touch of FANCY!


SO then on we moved to daughter number 2 of my Saturday models.... she had a lot of hair and was a typical 1st grader so I put a TV show on she loved and reminded her mom of the amount of hair on my head!  You see I TOO have a 1st grader!  Aghhh the tricks we learn!  I am sure it helped that I am not "MOM" to her so I can get away with a lot more! 

So... Just like Dani, Yasi loves to wear her hair down for school.  This is a first grade teachers nightmare.. it only makes it worse that they love headbands which I am sure never stay on their heads and become something for them to play with because when I pick Dani up from school it is never on her head anymore.  So I simply taught Roxy how to braid the middle part of Yasi's hair so it felt to Yasi as if it was down, but there was a minimal part of hair that could actually get in her face.  Then we threaded some ribbon through it to add a little fanciness.  If you know anything about first graders you will know that they have to have a hint of fanciness!  

I also decided to do the french braid inside out.  When braiding dark hair it seems like the braids blend in so braiding it inside out gives it a kind of 3D effect allowing it to be seen.  It appears to be more difficult only because it isn't what you are used to... however, it is actually is easier to do.  If you want me to show you, leave me a comment and I will post a video.  

You can see the lift of the braid here
You simply braid under instead of over

One VERY HAPPY and FANCY girl!