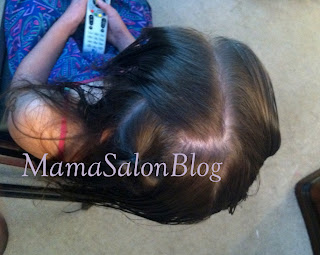

As you can see I decided to modify a previous hairstyle! One I have come to name the sunburst at our home. Not sure why, but it seemed to catch on. Because this is a modification of a previous style and my pictures were awful today, you may see me use some of the past pictures to show you how.
Start by parting the hair straight down the middle - as if you were making pigtails
I wish my part had been cleaner this morning but, believe it or not, this style was completed in less than 15 minutes (which may explain the awful pictures) so I decided perfection wasn't my goal.
Also, Boo's hair was half dry, half wet... I STRONGLY recommend that your child's hair be wet or dry, the in between stage is awful to braid as it sticks together a lot.
Then, secure one side of the hair so it stays out of your way
Now, stand to the side of your child (by their ear) and comb out the side you will be working with towards you. Then, stand behind them (trust me on where to stand - it will save you many grunts) and take a 1/2" - 1" section of hair close to the part. Boo has a lot of hair so I went with the larger amount.
Then flip it to the side so it stays out of your way. Continue to take about the same amount of hair so you end up with a center ponytail and loose hair all around. As you can see in my picture, the circle of the ponytail does not have to be perfect.
Now, bring back the section you flipped over and you will want to part it where you will start braiding. I recommend standing at your child's side and parting it more towards the back right .
 |
| Notice I flipped the front hair of the part forward so it stays out of my way |
Now you are actually done with the hard part!!! It is time to braid. I will reference an old picture to help you understand the beginning of the braid. Remember this?
In order to start the braid you will take TWO small sections from the hair outside the ponytail and TWO small sections from the hair in the ponytail. Join ONE section from the ponytail and ONE from the outside together creating the middle section of a braid. In other words, picture a traditional braid, the hair on the right will be made up of only hair from the outside section, the middle part will be a bit of both sections and the hair on the left will be only from the ponytail. Then you begin a regular french braid.You will bring SMALL sections from the outer section on the right and SMALL sections from the ponytail on the left. Be careful to keep the ponytail sections small as they need to last you all the way around the circle. Keep repeating this all the way around and when you come to the end finish with a traditional braid as far as you can go. Then tuck the braid into the circle. Now, Boo has really long hair so I had to have a little cute loop on the outside, I wasn't sure about it at first, but I ended up liking it. If your child has less hair, or shorter hair, you won't see this loop.
 |
| They weren't totally even - my 1st attempt & a total of 15 minutes... it was still super cute! |


Hi there! great stuff, glad to drop by your page and found these very interesting and informative. Thanks for sharing, keep it up! Have a great hair day!
ReplyDeletesalon smithtown, ny