
So back to my 2nd try on my last style... THANK GOODNESS it actually was not only easy but a clear success! This time I was able to complete this style (including the parting of the hair) in less than 15 minutes! Here is a picture of the finished product the second time around! Click here for for step-by-step style instructions (scroll down for the variation)


 |
| We tried a bow and decided it doesn't work for an 8 year old, perhaps for a younger girl it would be adorable! |

Trying a Variation
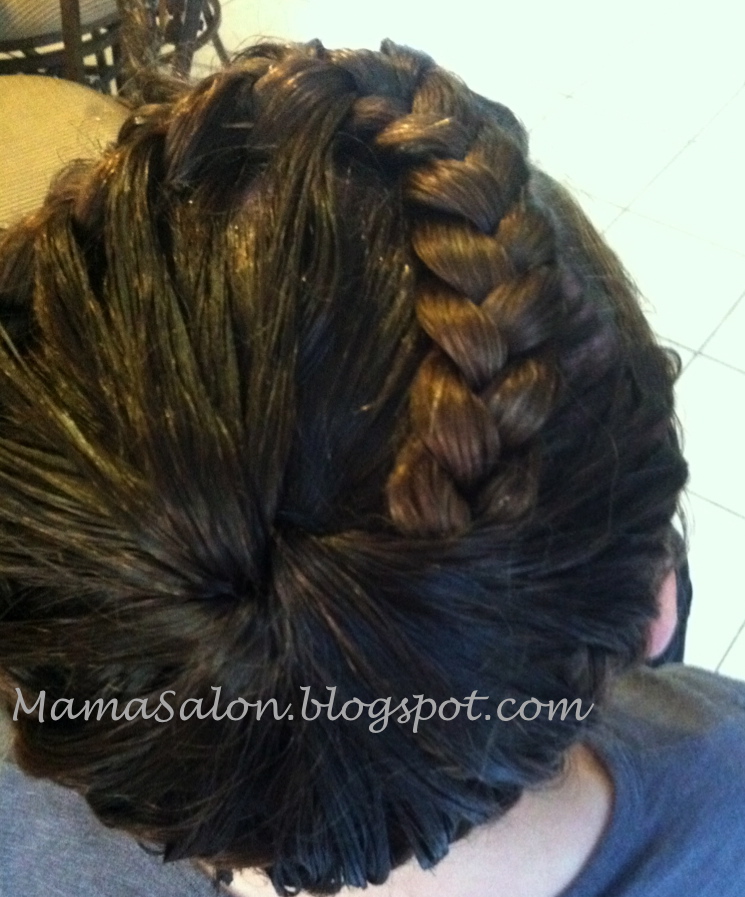
Then for school this morning my daughter decided she wanted this AGAIN since I had previously done it on a Saturday and a Sunday so her friends didn't see it. Ughhh this time I was working with frizzy hair that had been braided all night long. So I gave in but decided she was now being given what I lovingly call the "HALF MOON" variation of this style. It does require some hair pins but I only used 3 - it could have been 2 if I hadn't had a huge bump in the hair. CLICK HERE FOR INSTRUCTIONS ON HAIRSTYLE
 |
| How does my dog always manage to get in pictures! Camera Hog! |
For the Half Moon variation start with the part slightly higher up on the same right side and take pretty much the same size chunks of hair in. You can always take slightly larger chunks of hair towards the end if you see that you have too many. However, by starting a bit higher up you shouldn't have that issue. Follow all the same directions but the french braid will stop at a half circle. Continue the braid up and over the head, lay it down flat and tuck it into the circle (I have to pin it to make it lay flat - I pin it after I tuck it into the hair). Funny now that I look at the picture I guess calling this a French Braid French Twist would work too!

No comments:
Post a Comment